tutorial: stitched snowflakes (plus thread-drawing therapy for 2013)
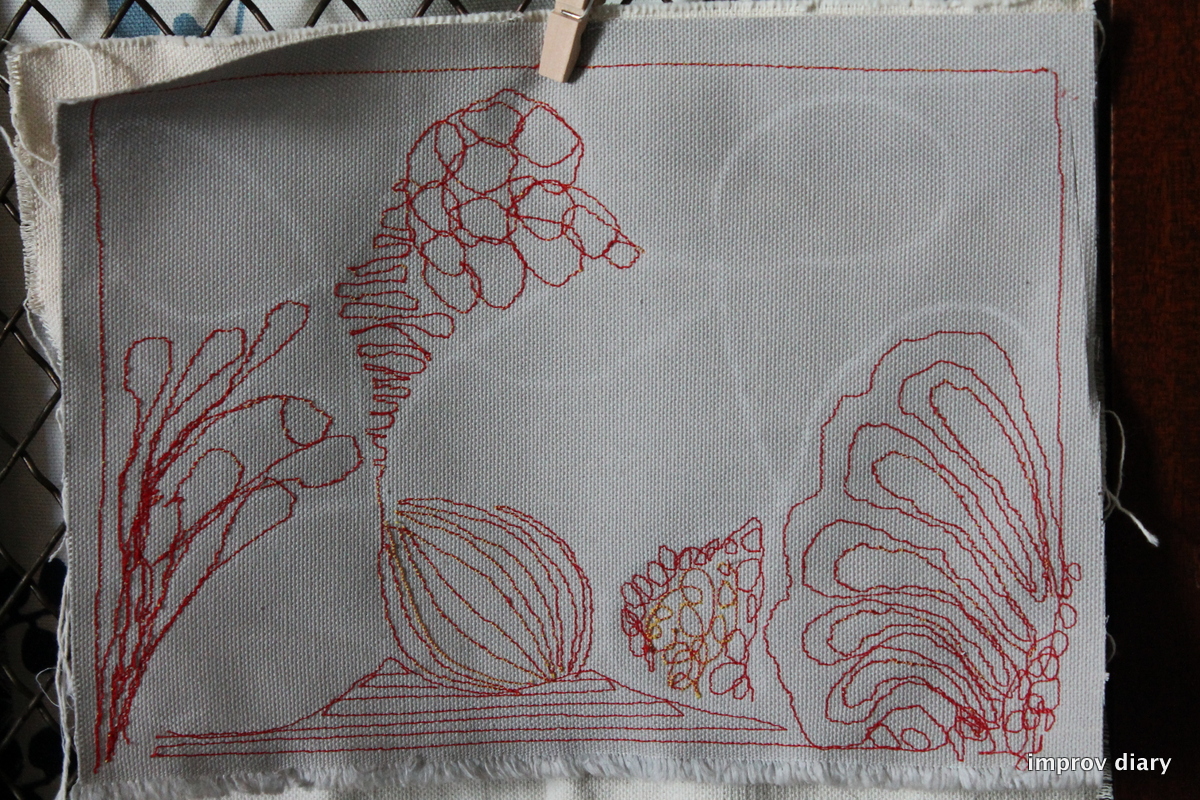
This is what I’d like to do a lot of this year: pointless stitching. This little doodle was the result of a go-with-the-flow session at the sewing machine. I’d sat down with the intention to create nothing but happiness. We spent all last year talking about pursuing this type of free-form creativity. And now this year, I plan to spend even more time doing it– making things with an open mind and an unstressed heart, and loving the results because they’re mine. How ’bout you…you up for some of this action in 2013?
Here’s another fun little idea I’d been toying around with, and finally got around to trying. After two mild winters, we got dumped with snow here in Western Mass, so it only seemed fitting to pay tribute with needle and thread. These stitched flakes are another great, open-ended, entirely fuss-free project.


Here’s how it’s done (this is so easy, you’ll laugh):
1. Draw circles
With chalk, trace some jar lids or CDs onto canvas or duck cloth.

2. Stitch your six flaky lines
Load up your machine with some nice contrasting thread, and simply sew three pairs of straight lines across the circle, starting at ending at your chalklines. The wilder the stitch type, the better, so now’s the chance to try out all those funky ones you never use! Indulge in some stitch dial roulette…

3. Add a backing and outline the flakes
(Notice that I was having too much fun to snip my threads after each line.) Once you’ve stitched all your lines, lay your fabric right side up atop a second piece of canvas or a sheet of vellum or cardstock. I used white vellum, since that’s what I had on hand. Sew around the perimeter of the flake with a straight stitch or a straight stretch stitch, following your chalk line. You’ve just attached a neat flip side to each flake. (If you don’t care about this, free free to skip this step–I knew I wanted mine to dangle in mid-air, so I wanted their backsides to be socially acceptable).

4. Make a hole for hanging
Draw a little dot with chalk or vanishing ink pen where you’d like the hole to be. Release the pressure on your presser foot dial (if you can) or use a free motion foot (if you have one) or drop your feed dogs (if you must) and, with a straight stitch, stitch some orbits around the dot. You’ll use a seam ripper to pierce the hole at the center.

5. Cut out the flakes
With scissors!

6. Hang ’em high
Pierce the holes with your seam ripper, as mentioned above. Thread some embroidery floss or sparkly cord through the hole for hanging. I decorated the flip sides with glue stick and glitter, because I was just in that state of mind. It was a nice state of mind to be in on a winter Sunday. I hope you find yourself in a similar playful and improv-y mood this weekend!!


Those are beautiful – everything! I love how you made an organic design with chalk and then filled in all of those spaces so differently. What are you going to do with that? Maybe a custom frame job?
Pingback: Tutorial: Doodle stitched snowflake ornaments · Sewing | CraftGossip.com
The free motion drawing looks like a sewn Zentangle:-)
Pingback: Tutorial: Doodle stitched snowflake ornaments | Sewing Patterns